Sunday, November 6, 2011

Bench Horse

What was intended to be the first of a pair of saw horses accidentally morphed into a small and portable bench. I've really enjoyed the evolution.


I've been trying to minimize my footprint as much as possible for reasons of budget and practicality (this was intended to be portable for use in Esprit Park). The first innovation was to leave one set of legs vertical to facilitate rip sawing. The unintended benefit has been that the legs provide an excellent clamping surface much like my old Roubo Bench.


The splayed back legs of the saw bench provide two benefits: stability and a foothold while planing.


In case anyone is wondering the casters do come off while I'm using the bench. So far it's working out really well to have the vise at one end and the planing stop at the other. I can just keep circling the bench as my tasks demand.

On a final design note: all materials except the vise and hardware were salvaged curbside in Potrero and Lower Haight. "The city provides."

- Posted using BlogPress from my iPhone

Thursday, November 3, 2011

A Step toward Freedom

My attempts to keep an inexpensive, smaller (and unplugged) tool collection has resulted in some frequent stumbling as I'd reach points in projects where I'd usually flip on the circular saw or router. I've learned to cope with an unplugged shop by adjusting my designs to suit the tools available, but there was one joint I was not willing to go without: grooves. In making doors and drawers a rabbeted panel was just too much compromise to bear.

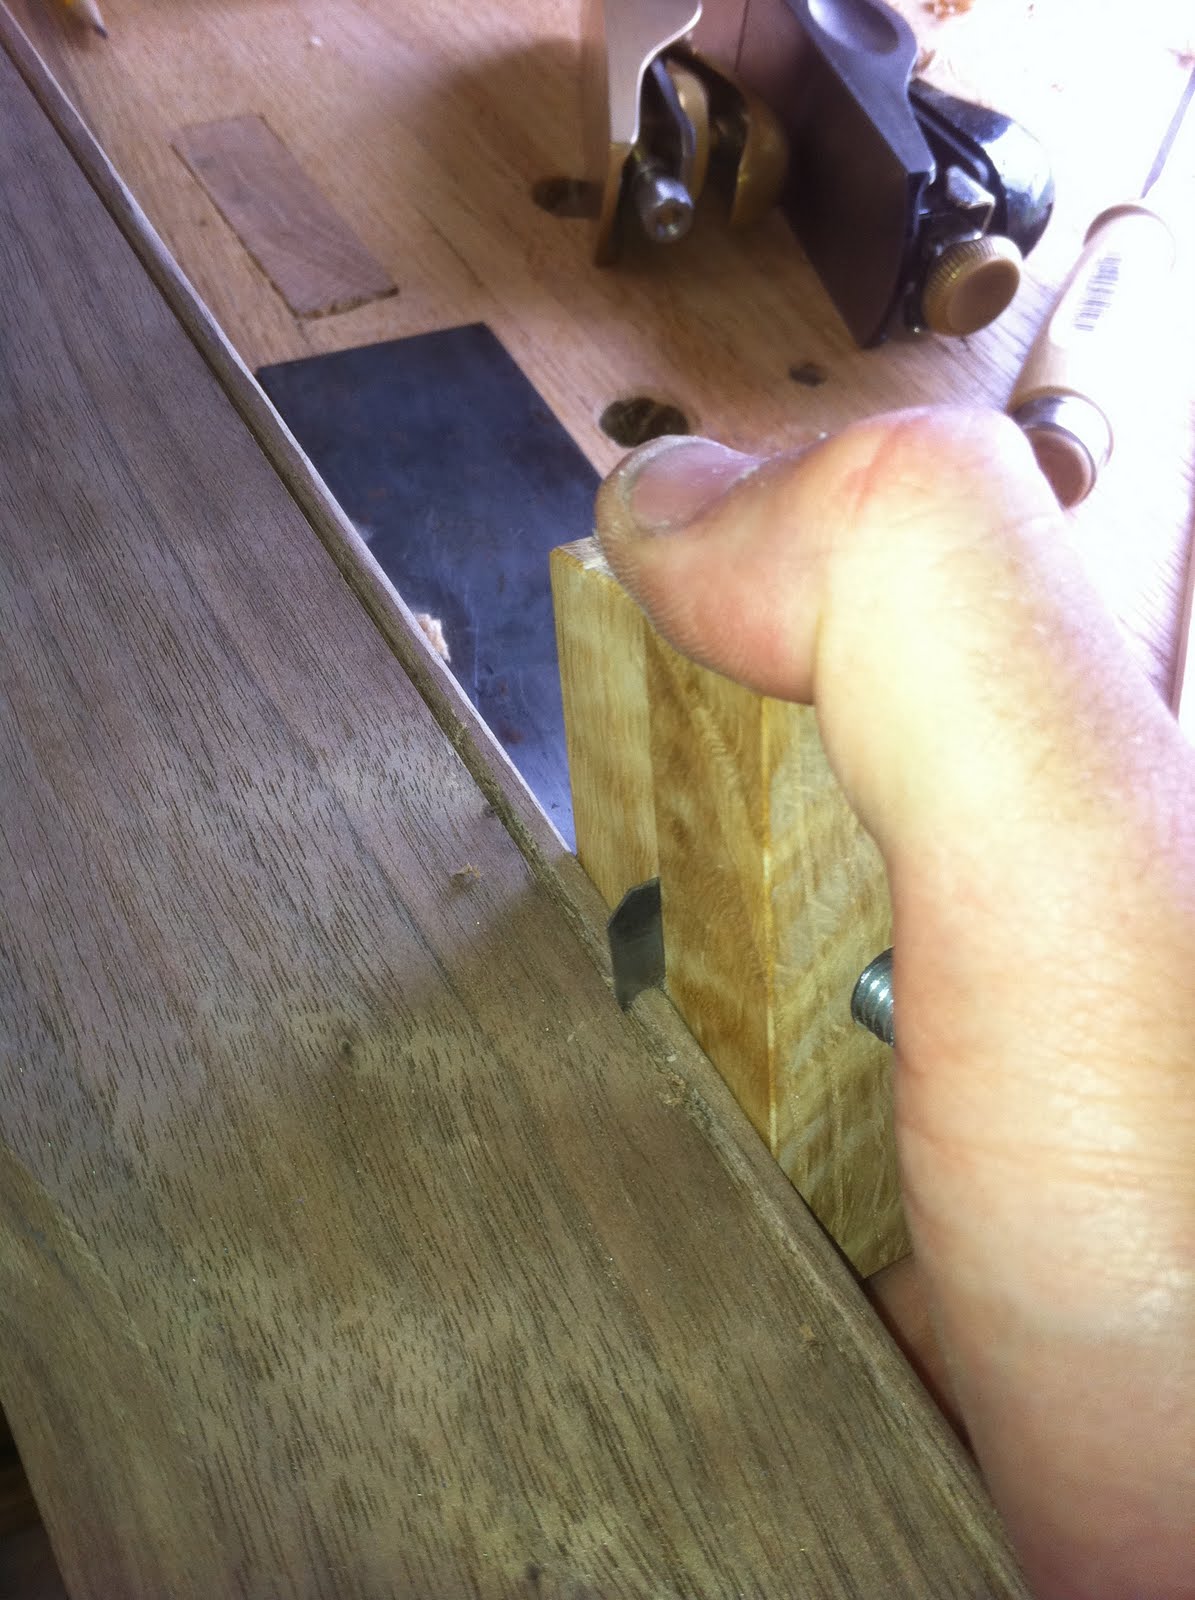
I stumbled around the Internet and used tool stores in the Bay Area unable to find a grooving plane that met my needs and my budget. About two weeks ago I got the idea to grind out the middle of a block plane blade and create a two-fanged grooving plane. The result is below, and it works
amazingly well.


The design is a basic Krenov-style lamination with the bottom shaped to match the plane blade's "teeth". I made two "teeth" thinking I'd always be able to plane with the grain, but this was an unnecessary feature: tear out is minimal when cutting a groove against the grain. I think I'll grind one of the teeth down to 1/8" for smaller grooves, but for now I'm just looking forward to using my new tool.

One last thing, chip clearance is flawless. No need for a side escapement cut.

- Posted using BlogPress from my iPhone

Location:22nd St,San Francisco,United States

Friday, October 21, 2011

"Pipe clamp" alternative


This idea came to me yesterday as I was thinking of a way to clamp up a large table with my stash of real pipe clamps still 3000 miles away in VT. It's a combination of a design I saw for a Japanese clamp composed of rope and wedges and a Lee Valley caul-clamp that was released a few years ago. I'm not sure how the pounds of pressure from a wedge will compare to an acme threaded pipe clamp, but I think a simple "snap-the-glue-up-over-my-knee" test will suffice to test if the clamping pressure is sufficient to produce a joint that is stronger than the wood surrounding it. If British rubbed joints can hold, so should this.

More pics to come soon after the clamp is assembled.

Thursday, June 2, 2011

Old tools new tricks

Let's start at the end. I've been designing more of my furniture with inset pulls. Pulls can be expensive, and their projection from the body of the piece can pose a risk of breakage. I've found that cutting into the drawer dividers can allow for an internal pull, and on the harder to access drawers I've sculpted the adjacent drawer faces to allow for easier hand access. You'll notice on the third drawer from the top that I've added a cockbead and this is explained below.

On this particular project I was embarrassed to discover that I had built the third drawer opening an eighth inch too tall for the drawer. My remedy was to attach an eighth inch strip of walnut and then scratch in a cock bead to hide the glue line.

The scratch stock is made from an old scrap of saw blade with a cock bead filed in via a chainsaw file. After a nervous start the tool worked beautifully.

Wednesday, May 25, 2011

All the drawers are fit

While this workstation is a form of packing (it's how my tools will travel to California), it has replaced all the time and energy I should have been spending packing up my apartment. Last night at dinner, my friend Andrea, a tutor, informed me that I was resembling a very productive version of some of her gamer students who can't get their homework because they spent all night playing Call of Duty.


So after letting Andrea's comment sink in I awoke this morning at 5am, and came to the shop intent on fitting the drawers so I could take a one-week sabattical from this project. Well, the drawers were fit in record time, and I feel good walking away for a little while to wrap up my remaining packing.


Oh yes and the weight looks like it will be approaching 125lbs. So the handles, while beautiful, will only be useful when all of the drawers are removed.

Tuesday, May 24, 2011

First drawer fit

I woke up with no alarm at six this morning and raced down to the woodshop to take the clamps off the case. I only had time to fit one drawer, but it was a great feeling.

Next came the dubious task of leveling the protruding tips of the pins and tails. The slow set epoxy reaches full strength in 24 hours, so it was essential that the protrusions be leveled before the epoxy reached full hardness. Otherwise your blade dulls in three passes and you may as well use an angle grinder to level the joints. I've made the mistake of waiting too long before and never want to be there again. (One of my lucky friends may remember sharpening my 4 hand planes one after the other as I dulled each out and grabbed the next so that the leveling could continue until the wee hours of the morning for a series of scrabble inspired benches).

Monday, May 23, 2011

Case Assembly

I spent 10 hours in the shop yesterday, but luckily had the foresight not to attempt a full assembly as I was far too tired and far too low on the blood sugar count to have successfully glued up the case.

I try to use Titebond I wood glue in all my projects, but this case had over 45 joints coming together at the same time and Titebond I's four minutes of working time was not going to cut it. I mixed a batch of slow-set epoxy, added some microfiber to prevent it from dripping everywhere and began assembly.

There were a few scary moments during assembly where I questioned my measurements (and right to live if I had been stupid enough to make a math error with over 50 hours invested in the project) but my guardian angel walked in at the critical moment and gave a much needed hand in synchronizing the clamps (and flipping the case over for a sledge hammer beating when the clamps proved inadequate).

I had been tempted to assemble the case without clamps because that is how I assemble my dovetailed drawers. Clamps can rack a drawer, so I just hammer the drawers joints together and let them sit overnight on a flat surface. I have seen larger dovetail projects spring back and open up the joints if left unclamped, and I wanted the case to be very tight because of the racking it will experience when I use it as a work station. Where this is all going is to say that if future joints are as tight as these, there is simply too much friction to allow for any spring back, and the sledge hammer will be the only clamp I'll use on future dovetail assemblies.

Thanks again Donald for the bailout.