Friday, April 6, 2012

Designing a Workbench (around available scrap)

The design of my last bench was heavily influenced by Scott Landis's The Workbench Book. It is an inspiring read to see how work tables evolve to suit the needs of different traditions or different individuals. It gives good insight into how to anticipate your own needs from a bench.

Before starting my next bench, I read Chris Scwarz's Workbenches. This book focusses on two different styles of workbenches, and takes a vey different approach than the Landis book. The piece I love about Schwarz's book is the emphasis on building with locally available and inexpensive materials. Well in San Francisco that means sidewalk shopping.


This junker yielded 15 - 2x6x8' boards of (surprisingly) dry Doug Fir. I'm now committed to spending less than $40 for the whole bench so I'm keeping my design very flexible. There will be some stripping and planing this weekend for sure and I'm looking forward to using my latest Alameda Flea Market purchase to remove some of the nails.

Sunday, March 25, 2012

Robots and Salvage Yards

Great day at Grandma's Haus with Derek finishing up the miter saw stand. This is my third and by far best miter saw stand to date. You'll need two piano hinges to pull it off.


We think it looks like R2D2 with the arms down. (We're really cool).

Other great event of the day was plowing into the 12/4 Walnut board I bought at Urban Ore for $7 (total). But it wasn't walnut, it was teak. Life sucks.


Posted using BlogPress from my iPhone

Location:Grandma's Haus

Sunday, January 22, 2012

Sliding Dovetails ... by hand

I began using this joint after I built a great router table back in VT, but I had thought the idea of cutting them by hand nothing more than a novelty. I have changed my mind.


I had read descriptions of hand cutting the groove in Tage Frid's books, but until you do it, it's just unbelievable how easy and forgiving the process is. Lay out in pencil, saw to your line and knock most of the waste out by chisel before cleaning to a final depth with your router plane. Like I said, it sounds hard until you try it. Cutting the male dovetail proved a different story.


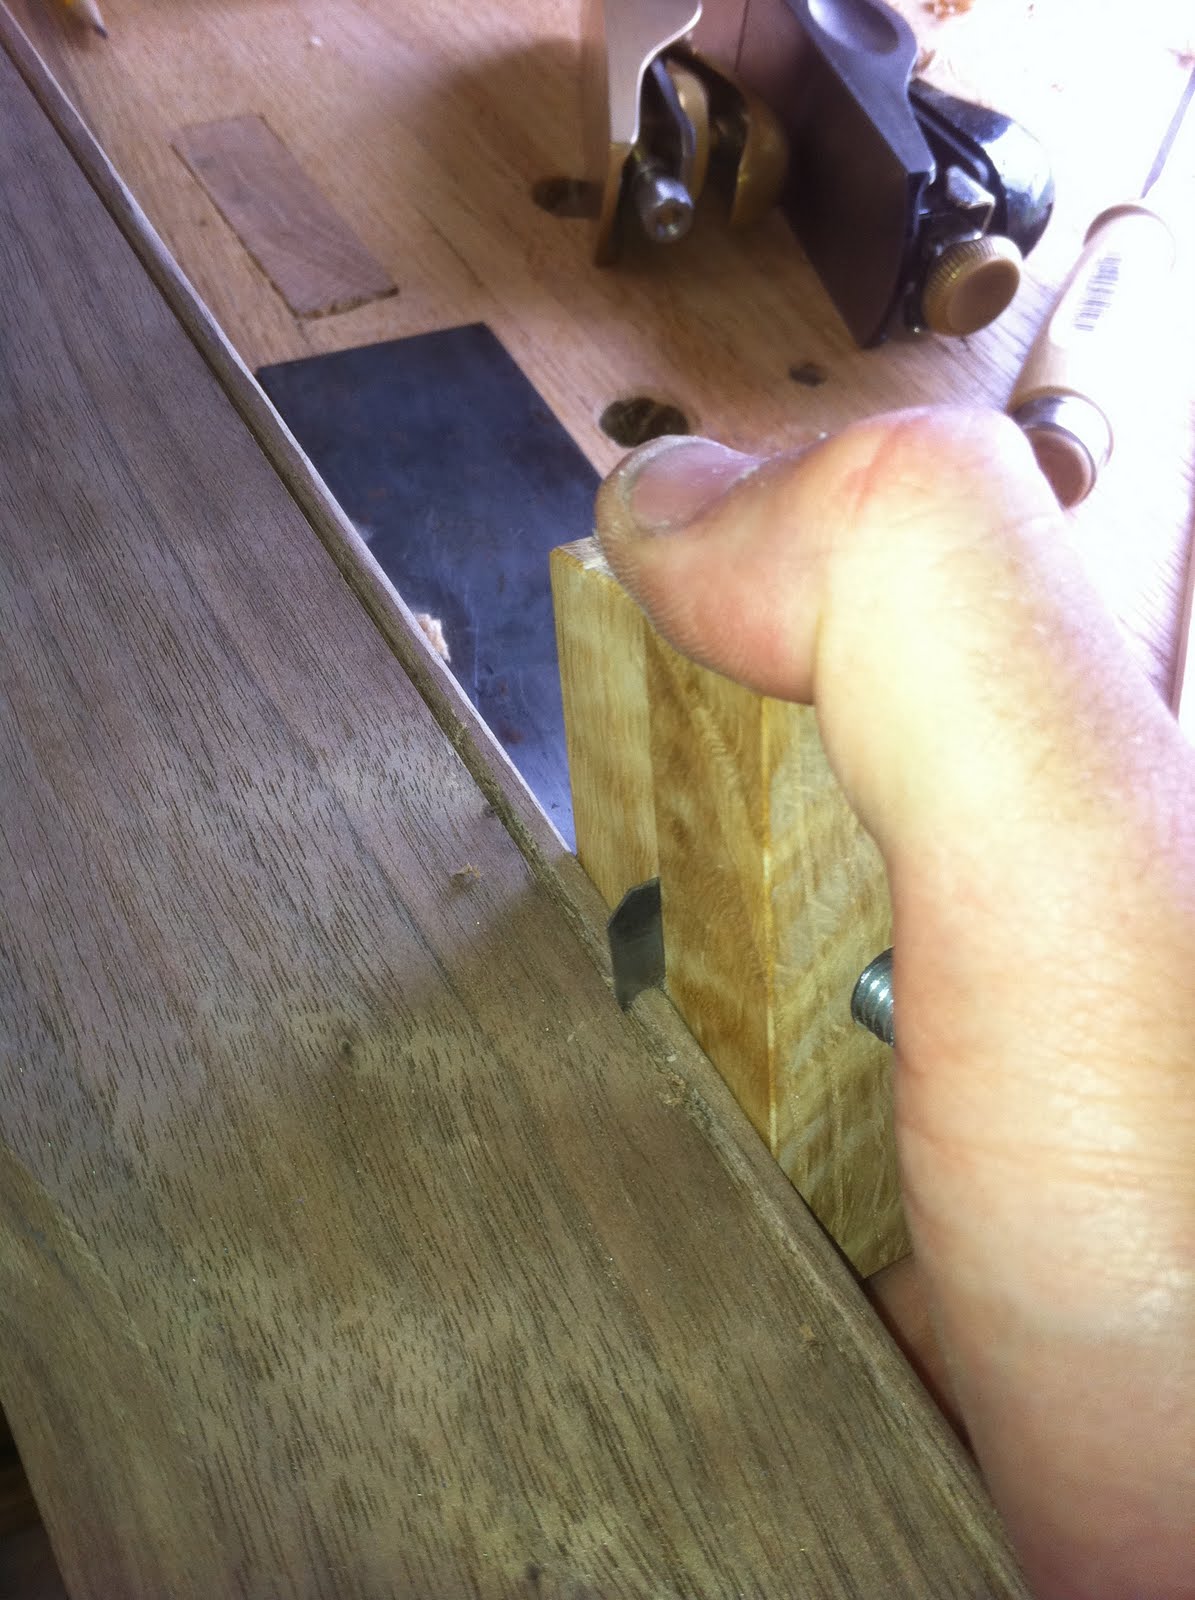
My dovetail plane is nothing more than an old rebate plane that has bootstrapped itself up in the world. It's working out, but as you can see it ate away at the shoulder in the left side of the picture. Lessons learned:
1) the nicker on "commercial" dovetail planes is essential, not a luxury.
2) the adjustable fence that comes with "commercial" dovetail planes is not a luxury either.

Hopefully I have more inspiring pictures on the next post. I think this is a pretty efficient sawbench design as well as a forgiving intro to making a sliding dovetail.

Sunday, November 6, 2011

Bench Horse

What was intended to be the first of a pair of saw horses accidentally morphed into a small and portable bench. I've really enjoyed the evolution.


I've been trying to minimize my footprint as much as possible for reasons of budget and practicality (this was intended to be portable for use in Esprit Park). The first innovation was to leave one set of legs vertical to facilitate rip sawing. The unintended benefit has been that the legs provide an excellent clamping surface much like my old Roubo Bench.


The splayed back legs of the saw bench provide two benefits: stability and a foothold while planing.


In case anyone is wondering the casters do come off while I'm using the bench. So far it's working out really well to have the vise at one end and the planing stop at the other. I can just keep circling the bench as my tasks demand.

On a final design note: all materials except the vise and hardware were salvaged curbside in Potrero and Lower Haight. "The city provides."

- Posted using BlogPress from my iPhone

Thursday, November 3, 2011

A Step toward Freedom

My attempts to keep an inexpensive, smaller (and unplugged) tool collection has resulted in some frequent stumbling as I'd reach points in projects where I'd usually flip on the circular saw or router. I've learned to cope with an unplugged shop by adjusting my designs to suit the tools available, but there was one joint I was not willing to go without: grooves. In making doors and drawers a rabbeted panel was just too much compromise to bear.

I stumbled around the Internet and used tool stores in the Bay Area unable to find a grooving plane that met my needs and my budget. About two weeks ago I got the idea to grind out the middle of a block plane blade and create a two-fanged grooving plane. The result is below, and it works
amazingly well.


The design is a basic Krenov-style lamination with the bottom shaped to match the plane blade's "teeth". I made two "teeth" thinking I'd always be able to plane with the grain, but this was an unnecessary feature: tear out is minimal when cutting a groove against the grain. I think I'll grind one of the teeth down to 1/8" for smaller grooves, but for now I'm just looking forward to using my new tool.

One last thing, chip clearance is flawless. No need for a side escapement cut.

- Posted using BlogPress from my iPhone

Location:22nd St,San Francisco,United States

Friday, October 21, 2011

"Pipe clamp" alternative


This idea came to me yesterday as I was thinking of a way to clamp up a large table with my stash of real pipe clamps still 3000 miles away in VT. It's a combination of a design I saw for a Japanese clamp composed of rope and wedges and a Lee Valley caul-clamp that was released a few years ago. I'm not sure how the pounds of pressure from a wedge will compare to an acme threaded pipe clamp, but I think a simple "snap-the-glue-up-over-my-knee" test will suffice to test if the clamping pressure is sufficient to produce a joint that is stronger than the wood surrounding it. If British rubbed joints can hold, so should this.

More pics to come soon after the clamp is assembled.

Thursday, June 2, 2011

Old tools new tricks

Let's start at the end. I've been designing more of my furniture with inset pulls. Pulls can be expensive, and their projection from the body of the piece can pose a risk of breakage. I've found that cutting into the drawer dividers can allow for an internal pull, and on the harder to access drawers I've sculpted the adjacent drawer faces to allow for easier hand access. You'll notice on the third drawer from the top that I've added a cockbead and this is explained below.

On this particular project I was embarrassed to discover that I had built the third drawer opening an eighth inch too tall for the drawer. My remedy was to attach an eighth inch strip of walnut and then scratch in a cock bead to hide the glue line.

The scratch stock is made from an old scrap of saw blade with a cock bead filed in via a chainsaw file. After a nervous start the tool worked beautifully.